The Fundamental Principle of Fashion
Three Ingredient Fro Yo
Hello my dearest readers, alas I am writing today bearing bad news, I have once again been cursed with the duty of getting my braces tightened and let me tell you, it is no picnic! (It hurts to even use the picnic metaphor because I wouldn’t be able to eat anything at it). Yes yes, I should be grateful for being able to have the luxury of getting my teeth straightened, and don’t get me wrong, I am, but oh how the day, the day I am finally freed from my metal mouth traps, that glorious day seems to slide further and further out of reach… OK I need to get to the point, the reason I am writing this post is because I can’t eat any solid food for the next two or three days and I need something cool to sooth my mouth. ENTER: Frozen yoghurt. I found this recipe on Buzzfeed and have decided to test it out, so fingers crossed!

Ingredients
- 3 cups of frozen strawberries
- 3 frozen bananas*
- 2/3 of a cup of plane Greek Yoghurt


Equipment
- knife
- container for the yoghurt
- cup measurements
- a food processor
- a freezer
Method
- Okay so, I planned to upload this blog post yesterday but I completely misread the recipe and didn’t realise the berries and bananas had to be frozen so i had to wait over night for that to occur so I am just making sure that you know!!
- So first I washed the strawberries and bananas then peeled and cut them. The recipe calls for three banana (but the bananas that I had bought were particularly massive), so I recommend to use two large or three average sized.


- I froze the bananas and strawberries over night and began the next set of the recipe in the morning.
- I threw all the ingredients into the food processor, it took quite a bit of blending so I would suggest adding the fruit to the yogurt in small chunks, I did not and it was quite the boo boo.
- Once everything was blended, about a year later, I poured the thick substance into my recycled ice-cream tub and waited for the suggested 2 hours for it to freeze.


Okay, just a quick note before I continue with the recipe, Buzz Feed suggests freezing for 2 hours which was definitely not enough time, it took nearly 5 hours for my yoghurt to be completely frozen.
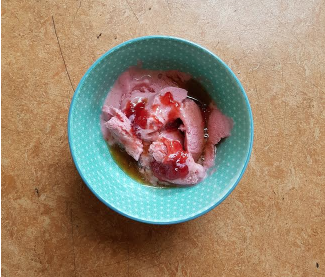
- When the time finally came to indulge in ma fro yo, I was impressed, it tasted amazing and it was so creamy yet solid (if that makes sense!). It tasted slightly bland though, so I suggest serving with toppings such as more berries, a jam or syrup of some sort, or white chocolate chips.

I was very impressed with the recipe and I couldn’t wait to have more the next day, however when I returned to the freezer in the morning, I found that the yoghurt had become too frozen and was now more solid and icy, no longer creamy. It was still edible but it didn’t have that initial wow factor to it. So make sure if you are undertaking this recipe, to continuously check the mixture while it is freezing so that you don’t miss out on its peak time!!
Over all, I thought the recipe was fabulous and I will be very excited to sooth my brace pain with it in the future! 5 strawberries out of 5!
To see the original link, click here:
https://www.buzzfeed.com/hannahwilliams/heres-a-refreshing-summer-treat-you-can-make-with-your-kids
